Installation (Windows)
We provide an easy to use installer including all dependencies for Windows. You can download the installer from the main site. Clicking the download button will save the installer to your disk. Double-click the icon to start the installation. It looks like this in your download folder:
![]() Figure 1: The Cytosplore Installer Icon after downloading.
Figure 1: The Cytosplore Installer Icon after downloading.
The installer will ask for administrator rights on the computer. This is due to the fact that we include the Microsoft Visual C++ Redistributable Packages. Cytosplore itself does not need or makes use of these rights. To continue the installation click Yes. You will be prompted to enter the administrator password.
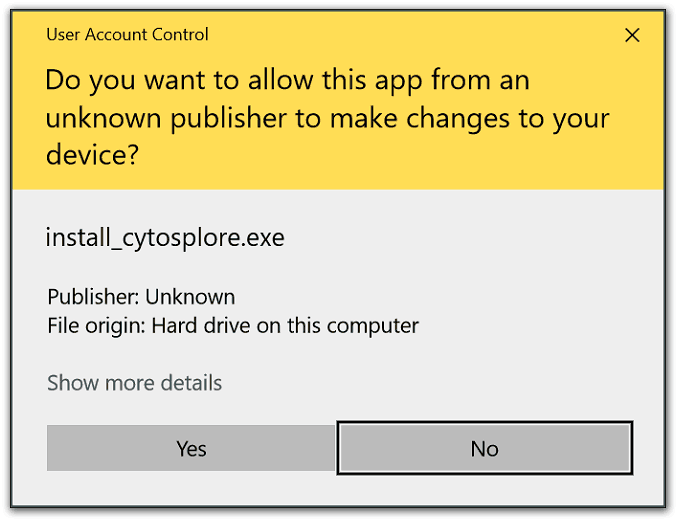 Figure 2: The dialog asking for administrator rights on Windows 10. Click Yes, to continue the installation.
The installer will show the license agreement, that your have to accept. Most importantly it states that the software can be used free of charge in an academic setting and if it is used in the scope of a scientific article the original Cytosplore articles need to be cited: T. Hollt, N. Pezzotti, V. van Unen, F. Koning, E. Eisemann, B. Lelieveldt, and A. Vilanova. Cytosplore: Interactive Immune Cell Phenotyping for Large Single-Cell Datasets. Computer Graphics Forum, 35(3): pp. 171–180, 2016. and V. van Unen, T. Höllt, N. Pezzotti, N. Li, M. Reinders, E. Eisemann, A. Vilanova, F. Koning, and B.P.F. Lelieveldt. Visual Analysis of Mass Cytometry Data by Hierarchical Stochastic Neighbor Embedding Reveals Rare Cell Types. Nature Communications, 8(1740), 2017.
Click I accept the agreement and then Next >.
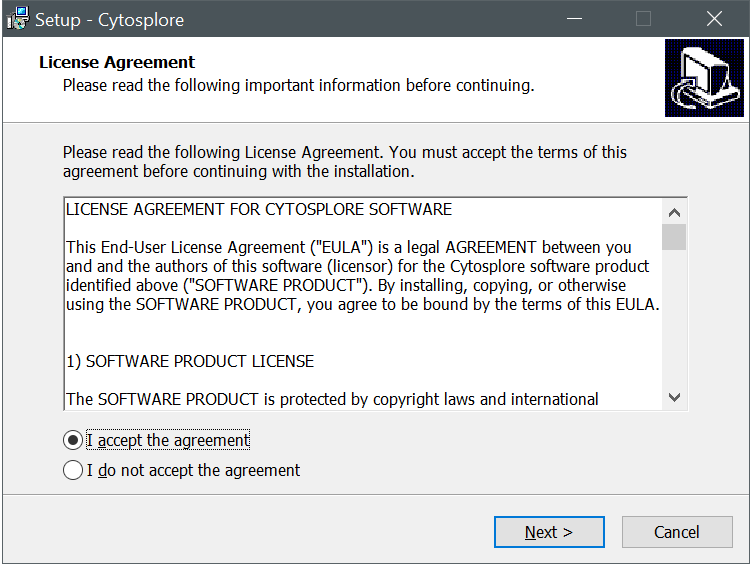 Figure 3: The dialog asking to accept the Cytosplore license agreement on Windows 10. Click I accept the agreement and then Next >, to continue the installation.
Next you can define the location where Cytosplore should be installed or simply click Next >.
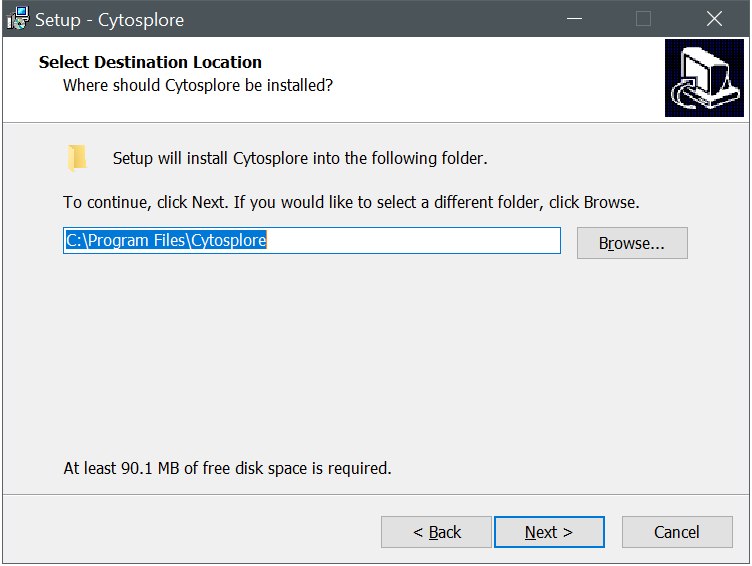 Figure 4: The dialog to define the target folder to install Cytosplore. Click Next >, to continue the installation or change the folder as desired.
In the next dialog you can define the name of or decide not to create a t Cytosplore start menu folder. Click Next > to continue without changes.
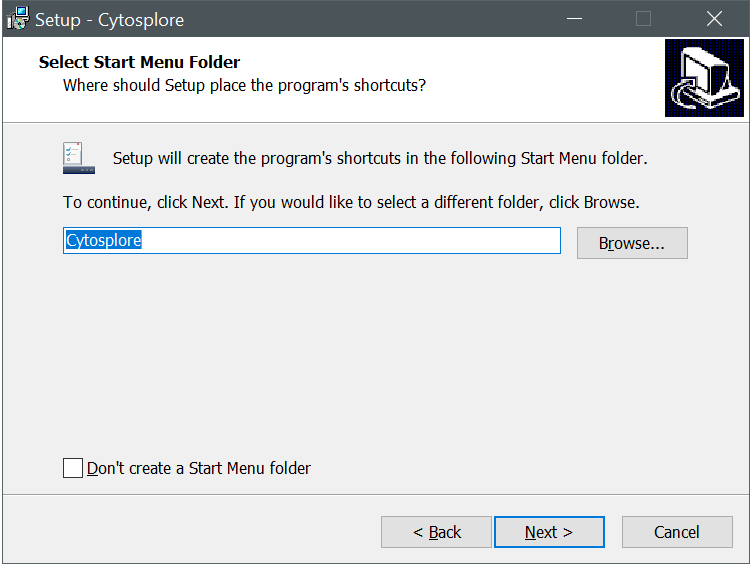 Figure 5: The dialog to define the start menu folder. Click Next >, to continue the installation or change the folder name.
Now you will be asked if you want to create a desktop shortcut. If yes, just click Next > to continue.
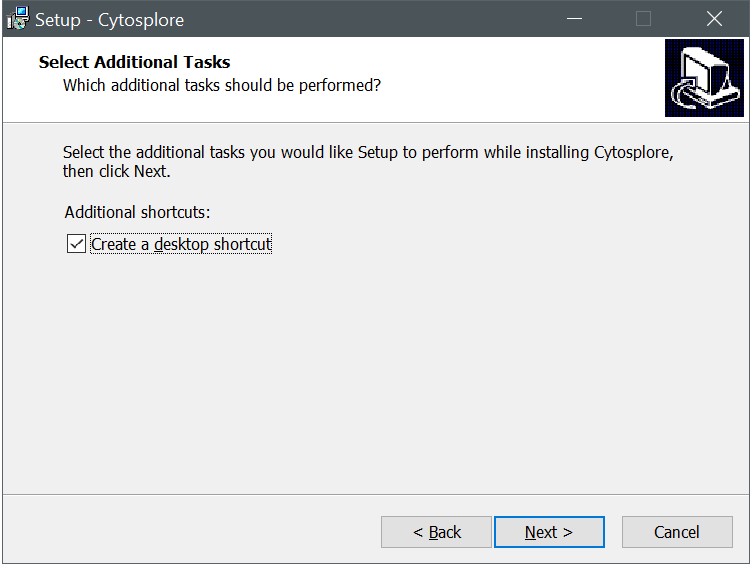 Figure 6: The dialog to create a desktop shortcut. Click Next >, to continue the installation with the default setting.
The last dialog befory putting the files in the appropriate locations shows a summary of the previous settings. Click Install to prepare the Cytsoplore installation.
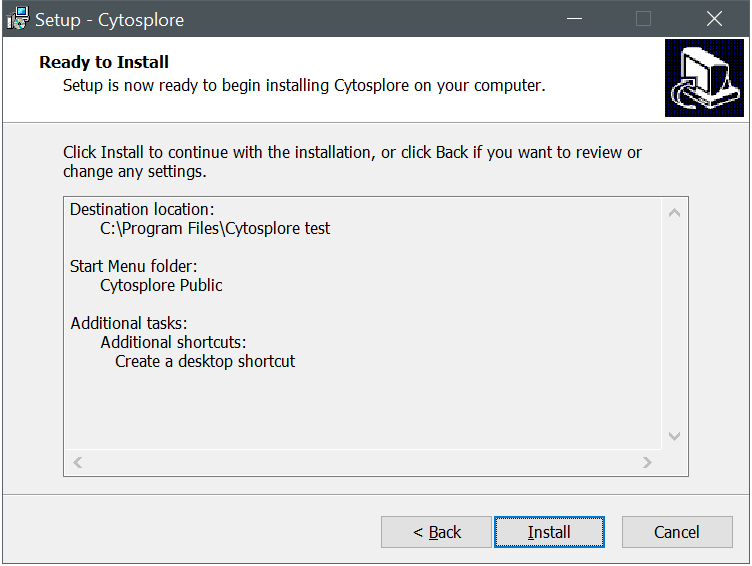 Figure 7: The summary dialog. Click Install, to carry out the installation.
After a succesful installation the following dialog will show. You can decide whether to launch Cytosplore now, and click Finish to complete the process.
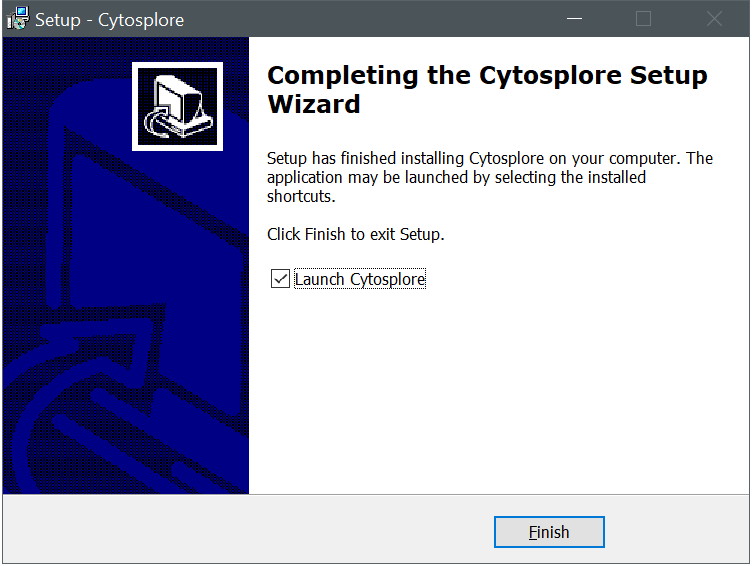 Figure 8: The final dialog. Click Finish, to finalize the installation and start Cytosplore.
Continue at Application Overview.


